

Baby Yoda Head Drawing Easy
It is no surprise that Baby Yoda has set the internet on fire, and I want to show you how to draw him in 10 easy steps! I will explain to you step by step on how to illustrate this adorable character from the Star Wars universe!
Who is Baby Yoda?
If you don't know who he is, he is a new Star Wars character from the latest Disney Plus show called The Mandalorian. In the show, he is referred to as The Child, not Baby Yoda. His name is still yet to be revealed to the audience. The name Baby Yoda was given to him by the internet because he looks like a younger version of Yoda. Also, his actions and the way he communicates are that of a toddler or baby.
Research Images of Baby Yoda
Before we start to draw Baby Yoda or The Child, let us do research of this cute character. The link below will take you to my Pinterest inspiration board for visual references.
What you will need to draw Baby Yoda
For this tutorial, all you need is a pencil and paper, and that's it. You can also follow these steps using your favorite digital drawing software. For this tutorial, I've used Procreate 5. I will add a few extra details on what brushes and settings I've used on Procreate 5. With that in mind, let us draw Baby Yoda!
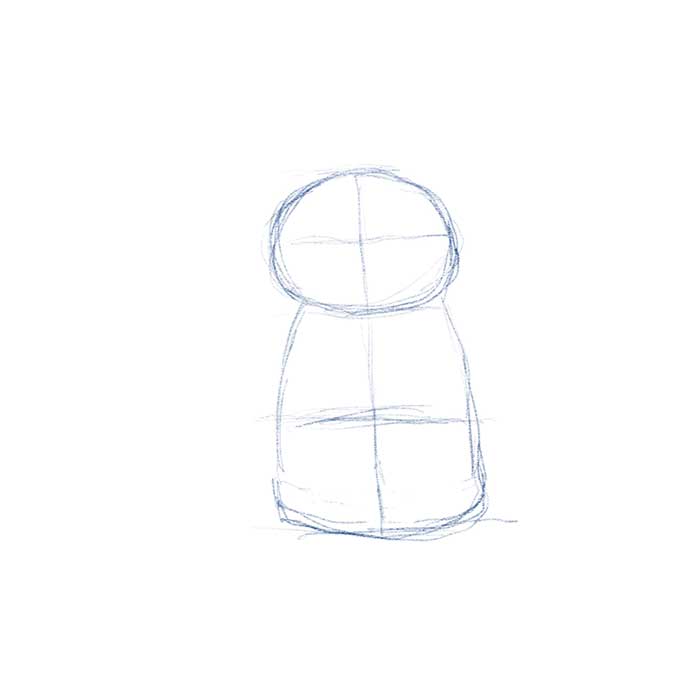
Step 1 – The Head
Draw a wide oval and divide it equally with a cross. For people that are using a real pencil to draw, keep your structure lines very light. I recommend using a 2H pencil for all sketch art. In the end, we will go and erase these when we are adding shadow and detail with an HB pencil.
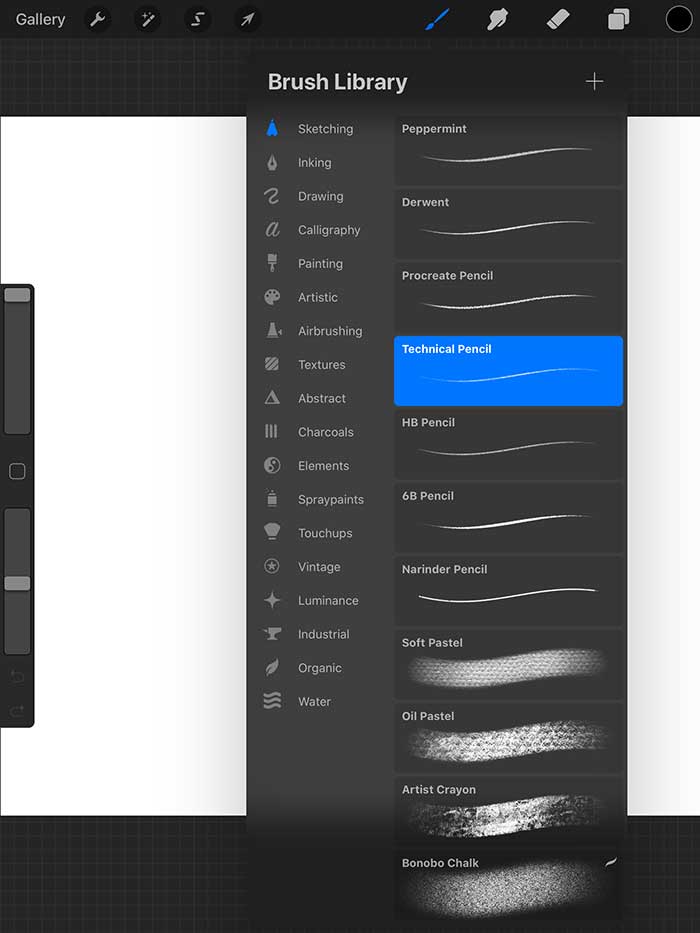
For Procreate users, you can use a soft light blue color using the brush"Technical Pencil." You can find that brush under theBrush Library -> Sketching -> Techincal Pencil. When you have that brush selected, reduce the opacity to 50%. The current size is acceptable, we will scale down when we are adding detail to Baby Yoda.
A small side note for Procreate users. Make sure to update your software to version 5.

Step 2 – The Body
The next step is to draw the body. Use the head size that you just sketched as a unit of measurement. The height of this Baby Yoda size is about three heads tall. The width is about the same as the head but with a slight taper at the top. Once you have that shape, draw another equally divided cross.
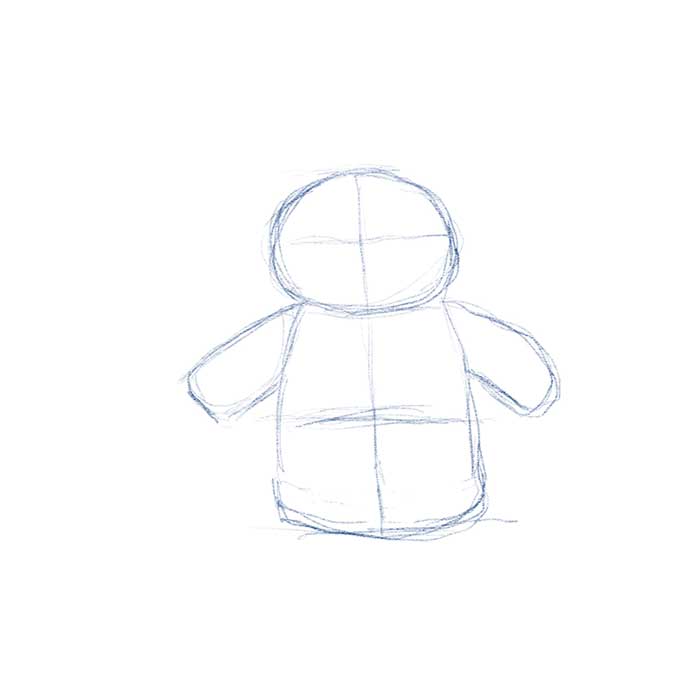
Step 3 – The Arms
Once you have the body drawn out, we will add his arms. The length of his arms is about 3/4 the size of his head width. Take that line and attach it to the top of the body. The thickness of the is about 1/3 the width of the head. Once you have that line, draw a parallel line to the body. The shape should resemble like the sample below.
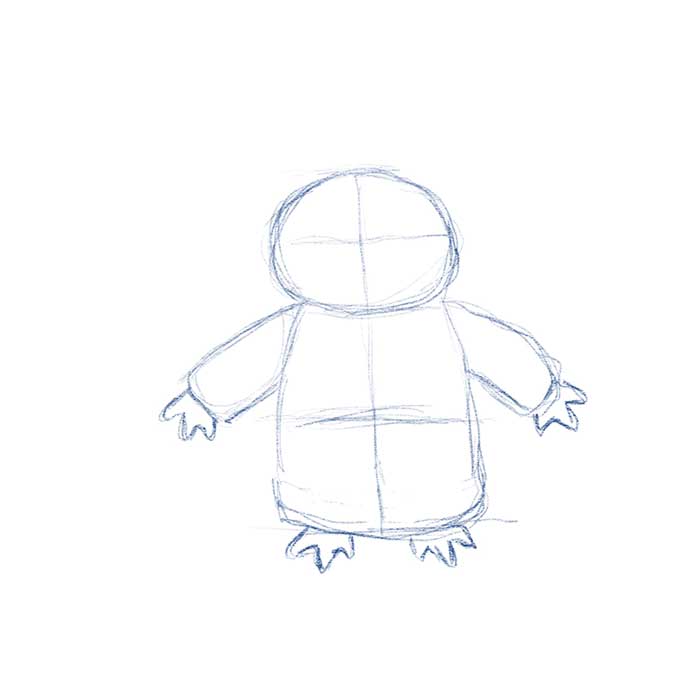
Step 4 – The Hands and Feet
The hands and feet can be a bit confusing, but once you understand how they are constructed, they are easy to draw. For the fingers, draw an "M" and for the thumb draw a Triangle, or "V" make sure that you keep the points rounded. You don't have to illustrate the feet if you want. You can get away with just his hands.
Step 5 – Neck Collar and Outfit Detail
The next step is to draw a bent rectangle with rounded corners. It is okay to overlap this shape with the rest of the body. Add a couple of "S" curves for the front fold in his garment. You can also refine the overall shape of the clothing too. For those of you using a traditional pencil and pencil and paper. Keep these lines light.
Step 6 – Big Pointy Ears
The next step is an essential feature for Baby Yoda. Just like the original Yoda, this child version also has big pointy ears. You can think of these shapes as the mathematical symbol greater than ">" and less than "<. " Remeber to add a slight bow for all the segments. Use the image below as a guide on how the ears connect to his head.
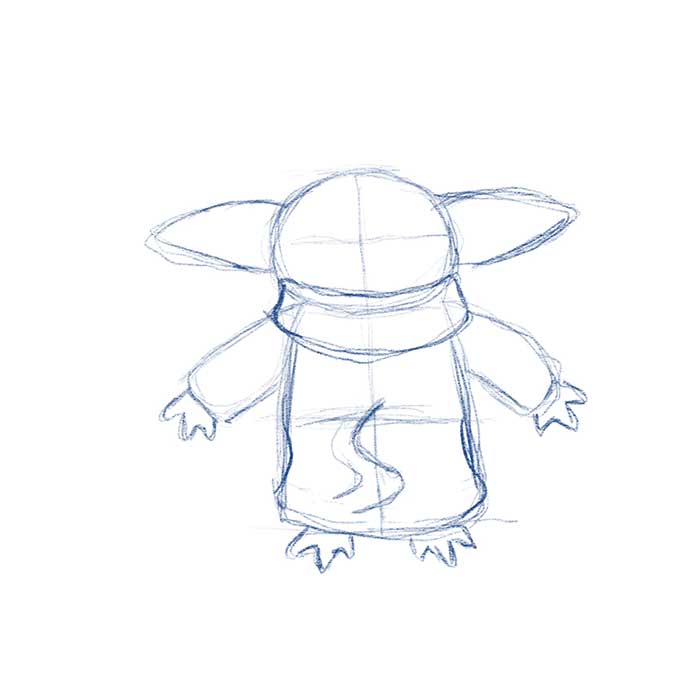
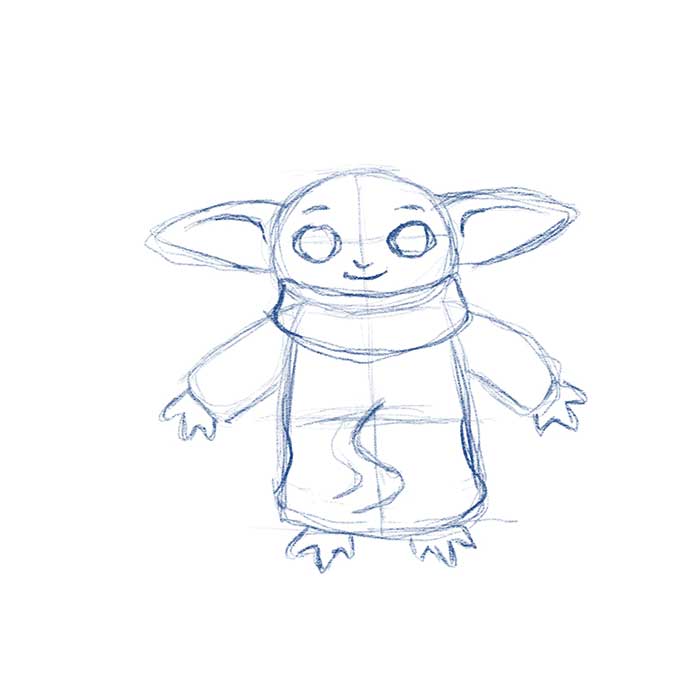
Step 7 – Baby Yoda's Face
This is probably the most crucial step in this tutorial, and that is to draw Baby Yoda's face. You will need to illustrate two oval shapes that rest about the center of his head. Use the first and third quarter line as the center for each oval. Draw a little "U" shape just below the bottom portion of his eyes. After that is drawn out, you can then add his mouth. A simple smile will do. You can also add some detail to his ears. Use the sample below as a guide.
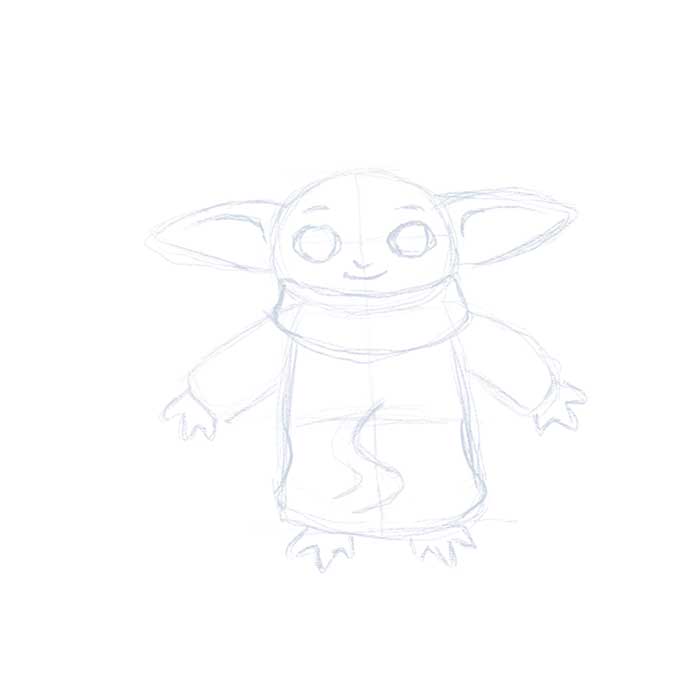
Step 8 – Reduce Opacity
This next step is for people who are drawing Baby Yoda using a drawing program like Procreate 5. Whichever software you are using, drop the opacity of the entire image to 25%
For those who are using pencils. Make sure your sketch lines are light.
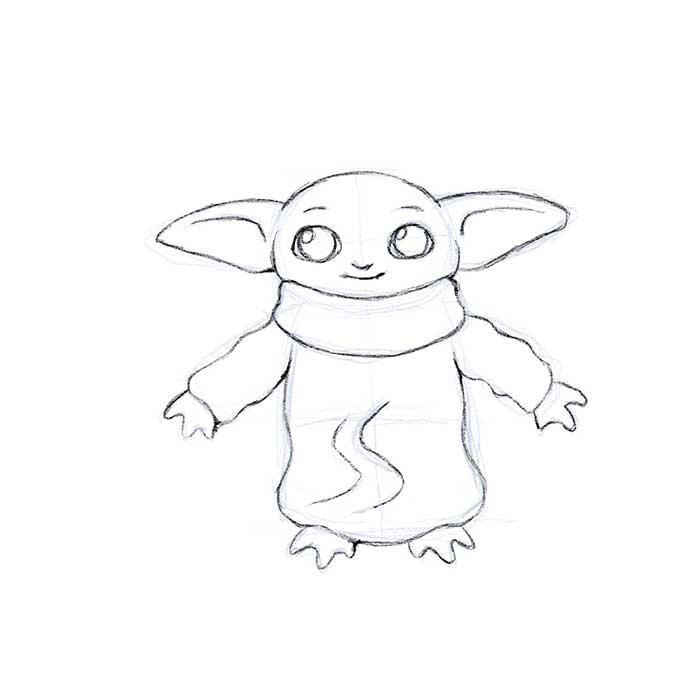
Step 9 – Define the Sketch
We are almost finished with Baby, all we need now is to give definition to our sketch. For those of you using a traditional medium, you will need to press down your pencil a little harder to generate clean detail. You can also use a darker lead grade. I recommend using a 2H lead for light lines and a regular HB pencil for detailing. For his eyes, we are gonna draw a couple of circles. One for his iris and the other for some highlights. Check the reference below as a guide.
For those using Procreate 5 or any drawing app, we will create a second layer above our sketch line and use it as a guide for us to draw our detail. We can now change the size of our Technical Brush to 75%. Notice the thin detail on the sample below versus our rough sketch lines.
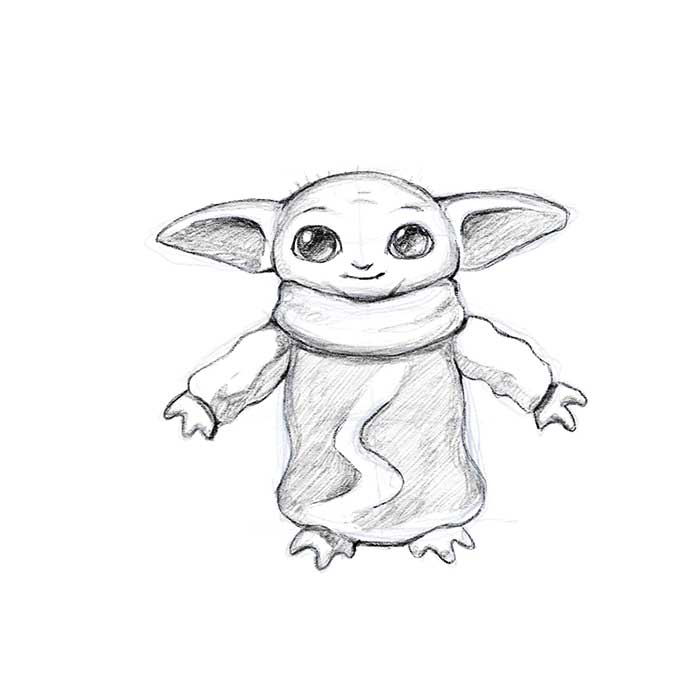
Step 10 – Shading Line Art
If you are happy with just the line art of Baby Yoda. You can stop at Step 9. If you are feeling bold and want to add some shading to your drawing. You can continue working on your line art. Make sure you pick a light source and which direction you want your shadows to be cast. A balance of brightness and contrast will help your drawing feel like it has form.
To do your shading on Procreate 5, set your Tenchincal Pencil to 100%. You can play around the various size to taste or even use a different brush. Make sure you create a third layer and place this below your line art.
The subject of shading is a complex topic itself. I will do my best in another tutorial on how to shade. You can use the image below as a guide on how to shade.
Conclusion on How to Draw Baby Yoda
I hope that this tutorial helped you to draw Baby Yoda in 10 steps! Let me know if you will like to see a tutorial on how to color Baby Yoda using Procreate 5.
If you liked this free tutorial and want to show your support. The least you can do is share this article with your friends and family on social media. A follow on Instagram and like on my Facebook page will be awesome!
For those who want to go above and beyond. You can show your support with the purchase of my artwork on myRedbubble store. Donations are also welcome! Your support will help me generate more free content for you and any inspiring artists. Remember, let me make your design dreams come true! If you have any questions feel free tocontact me.
Check out my tutorial on"How to Draw a Mermaid."
Baby Yoda Head Drawing Easy
Source: https://dreampigment.com/how-to-draw-baby-yoda-in-10-steps/
Posted by: millerforcer.blogspot.com
0 Response to "Baby Yoda Head Drawing Easy"
Post a Comment